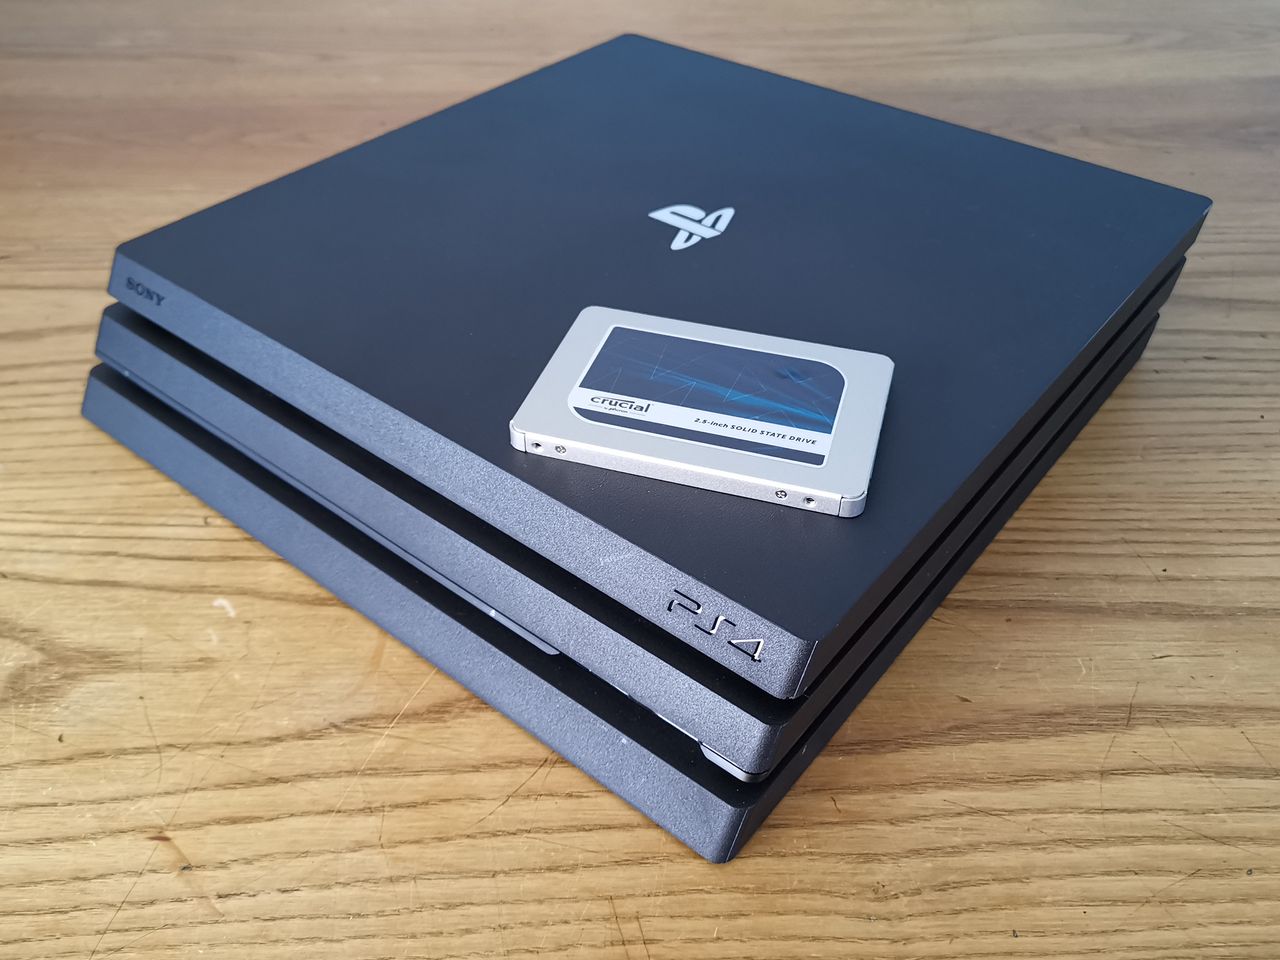

A steady stream of a Sony PS5 console rumours and reports have already got T3 incredibly excited for the next-generation system, which promises to be a PS5 games playing powerhouse that far outstrips even today's best video game consoles such as the Xbox One X and PS4 Pro.
However, there is a way you can get a taste of next-gen today, by upgrading one of today's most powerful consoles with a faster and more capacious storage drive. By swapping out the maker's bog standard hard drive with one of the best SSD storage drives on the market, you take your system up a level and allow PS5 games to load faster and install far more of them, too, even if they are hundred gigabyte-plus AAA beasts.
And, as we feel you should always look to squeeze every last drop of performance out of your technology, here we've decided to upgrade a PS4 Pro console, which is the Sony system many PlayStation gamers will be relying on to take them up to the launch of the PlayStation 5.
Want to make your PS4 Pro load games and applications faster as well as boast the ability to store many more games, too? Then read on and follow our simple, pictorial PS4 Pro hard drive upgrade guide.
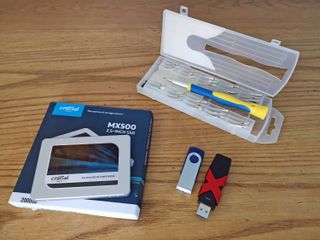
The small amount of tools and equipment we need to complete our PS4 Pro hard drive upgrade.
As we were so happy with the results of our PS4 hard drive upgrade back in 2016 we once more opted to use a Crucial SSD drive for our PS4 Pro upgrade. Consulting T3's best SSD storage drive guide we were immediately pointed to one obvious option, the Crucial MX500 2.5-inch 2TB SSD, which currently tops the guide as the absolute best SSD money can currently buy.
This PS4-compatible SATA 6.0Gb/s drive delivers a blisteringly fast 560 MB/s maximum read speed and 510 MB/s maximum write speed which, when combined with 2000GB of storage space, offers to significantly improve performance when compared to the stock PS4 Pro hard drive. For the record, the standard PS4 Pro hard drive is a HGST Travelstar 5K1000 HDD capable of RPM of 5400 and a 1TB capacity.
We chose the Crucial MX500 2.5-inch 2TB SSD to upgrade our PS4 Pro's storage capabilities.
And, simply put, we think it fair to say that the HGST drive is an underwhelming option for a flagship console. Yes, it does a job, and 1TB of space (more like 900MB after system installation files) is not bad, but its 5,400 rpm speed is bog standard and is not capable of the rapid read and write speeds that SSDs are capable of. A state-of-the-art SSD is a more more apt pairing for Sony's flagship console.
Sign up to the T3 newsletter for smarter living straight to your inbox
Get all the latest news, reviews, deals and buying guides on gorgeous tech, home and active products from the T3 experts
For the upgrade we needed very little in terms of hardware and tools (see above image). Asides from the SSD the only other things we needed was a screwdriver set (you only need a small crosshead actually), as well as a brace of USB drives (we ended up using two, but technically you only really need one with a large capacity).
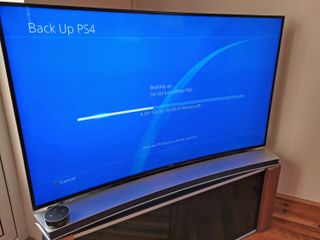
After downloading the latest version of the PS4's system software to one of our USB sticks, we used the second to back up our existing PS4 Pro's account, captures and save games.
So, onto the actual PS4 Pro upgrade. Before we started playing with any hardware the first thing we did was take one of our USB sticks and backed up our PS4 Pro's system data to it. Detailed instructions on how to do this can be found on PlayStation's official website, however it simply entails going to Settings > System > Back Up and Restore.
Once we had initialised the backup, which can include games or just core user data, captures and save games, we then visited PlayStation's official website and downloaded the latest update iteration of the PS4 OS, which was revision 6.20, and transferred it onto our second USB.
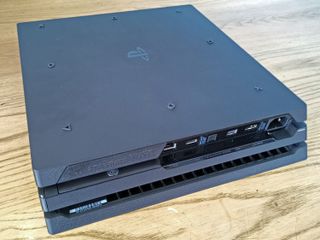
To start your hard drive extraction power off and unplug the PS4 Pro and then place it upside down on a stable, flat surface.
With a fresh version of the PS4 OS ready to go on one USB drive and our back-up system image on the other, we then proceeded with the PS4 Pro HDD extraction, all the while consulting Sony's official material. Pleasingly, and unlike the original PS4 that necessitated you remove a piece of its panelling to access the HDD enclosure, on the PS4 Pro all you need to do is actually remove one small plastic cover on the rear.
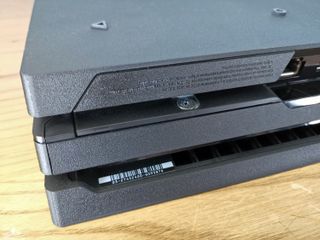
The plastic cover over the PS4 Pro hard drive bay just pulls off.
This plastic cover is held in place by just a few very shallow plastic tabs so by simply reaching behind the cover on the right hand side with a finger and gently pulling you can free the cover entirely in seconds. With the panel removed, the hard drive bay is visible and, pleasingly again, is held in the system with just a single cross-head screw.
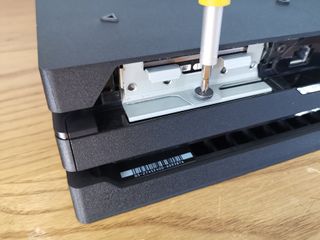
Remove the single screw to allow the hard drive bay to slide out of the system.
Once the screw is removed the drive bay simply slides out, revealing the stock PS4 Pro hard drive in its bay holder. The bay securely holds the HDD with four side-mounted screws.
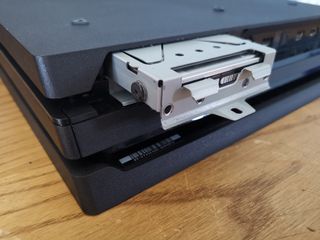
Making sure not to remove the rubber inserts from the screw holes, we then proceeded to unscrew the original drive from its cage. One all four screws are removed the drive simply slides out of the holder.
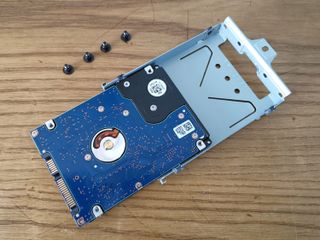
The original HDD is removed easily from its cage.
That is all the disassembly we need to undertake; Sony really have made it super easy to upgrade the hard drive in its PS4 Pro system, which makes us think it too didn't really think the original drive was a suitable match. Regardless, compared to some system's we've upgraded we find this openness and ease of modification very welcome.
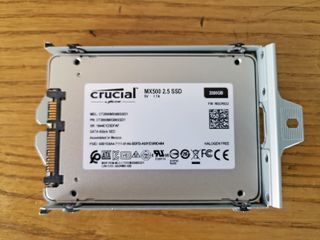
The new Crucial SSD drive sitting loose in the PS4 Pro hard drive cage - be sure to carefully line up the holes to ensure a tight fit.
Now we could start the rebuild. We grabbed the Crucial MX500 and reversed the process we had just completed. First we put the Crucial drive in the drive bay, next we re-inserted the four mounting screws and thirdly we slotted the drive bay back into the system.
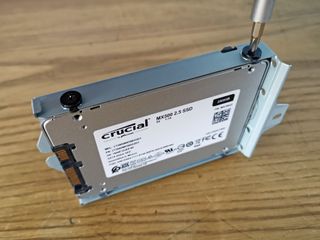
We found turning the cage on its side helped us line up and then screw in.
We then re-inserted the PlayStation screw to secure the drive bay in the system and slotted the hard drive cover back onto the system, clicking it back in place. We then re-inserted the single screw and replaced the small plastic cover, too.
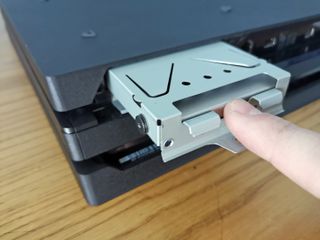
Simply slide the cage with the new SSD storage back into the PS4 Pro, then secure with screw and plastic cover.
With the PS4 Pro looking as it should again we then inserted the USB stick with the fresh copy of the PS4 OS into one of the USB ports on the front of the PS4 Pro. With this achieved we then re-wired everything back in.
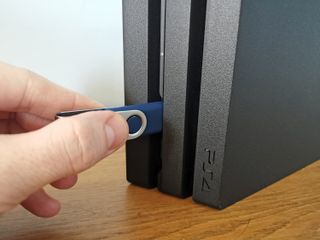
With power now returned to the system, we then held our finger down on the PS4 Pro's power button for 7 seconds until the console beeped. We then waited a moment as the console booted up in safe mode.
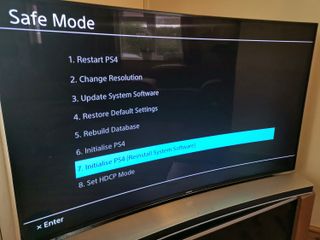
With the system in safe mode and displaying a numerical options menu we proceeded to select option 7, entitled "Initialise PS4 (Reinstall System Software). Selecting this option, the machine then asked for us to insert a USB drive with a fresh PS4 OS on it (which we had already done), so simply clicked to proceed and then kicked back as the OS was installed on our new SSD.
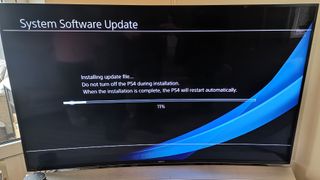
Installation of the PS4 OS took only a few minutes.
Once the installation process had completed, the system rebooted and we were presented with the standard setup wizard that all PS4 consoles ask you to run through to set up your system.
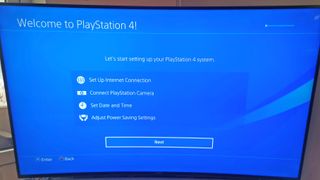
After setting up Wi-Fi, date and time, power settings and accessories the system then displayed a welcome to PS4 setup complete screen. We clicked Start Now to boot into the PlayStation XrossMediaBar.

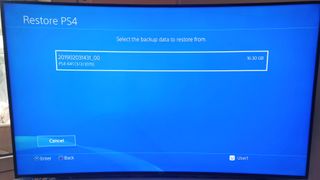
Now, the last thing we needed to now do was use the backup image of our previous PS4 Pro system to return the console to its former state, albeit now with a rapid and much bigger SSD drive installed. To do this we removed the USB stick with the system software on it and inserted the one with the back up image. One quick navigation to System > Back Up and Restore later and we selected our image of the USB and then sat back while it was loaded.
The backup complete, the only other thing to do was head to System > Storage and bask in our 1.77TB of free storage space for games, which we soon filled with top PlayStation titles like Horizon: Zero Dawn, God of War and Marve's Spider-Man, which all loaded quicker than they ever had done before.
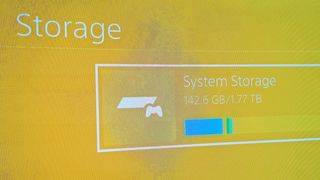
Increased levels of storage can be yours, too…
So, there you go - it is really that simple. Get a PlayStation 4 compatible SSD such as the MX500, follow this guide, and then enjoy faster loading games and more of them too, which will definitely help tide you over until the PS5 hits store shelves.
Rob has been writing about computing, gaming, mobile, home entertainment technology, toys (specifically Lego and board games), smart home and more for over 15 years. As the editor of PC Gamer, and former Deputy Editor for T3.com, you can find Rob's work in magazines, bookazines and online, as well as on podcasts and videos, too. Outside of his work Rob is passionate about motorbikes, skiing/snowboarding and team sports, with football and cricket his two favourites.
-
 Peloton users just got a cool new feature update
The brand is stepping up its game in fostering community among its users
By Matt Kollat Published
-
 UK Netflix and Prime Video subscribers might soon have to pay more to stream content
Feeling the squeeze? This proposal could see streaming services get more expensive
By Chris Hall Published