
As we all know, skincare trends come and go more often than we can count. Some of them work well and some of them don't, but whatever happens, it's always interesting to try them out.
Recently, one practice that has captured the attention of millions on TikTok is Gua Sha. We're big fans of TikTok trends here at T3, but this ancient technique has had 2.5 billion views on the social media platform and is still continuing to grow. To find out more, we spoke to SXCGLO's founder and skincare guru, Farnaz Khan, who shared why this technique is loved by so many in the beauty industry.
Before you find out more yourself, have a look at these other viral TikTok trends that might catch your attention:
Viral TikTok trend 'Girl Dinner' explained: why is it so controversial?
This bargain Decathlon travel bag is going viral on TikTok!
I’m not convinced about TikTok’s new ‘Bed Rotting’ self-care trend
Can’t get to sleep? Try TikTok’s Sleepy Girl mocktail
Sign up to the T3 newsletter for smarter living straight to your inbox
Get all the latest news, reviews, deals and buying guides on gorgeous tech, home and active products from the T3 experts
What is the viral TikTok Brazil Nut trend? Nutrition expert reveals why you should try it
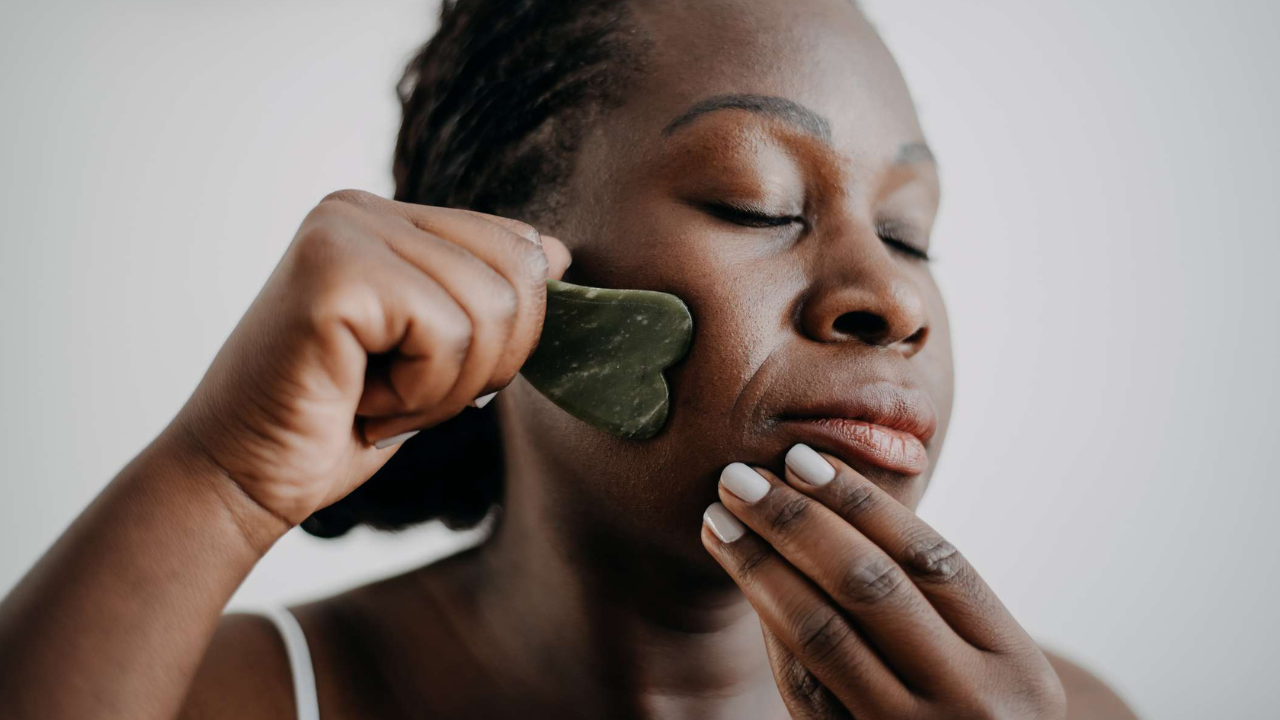
Gua Sha offers a natural and effective way to achieve deeply hydrated and radiant skin, and beauty enthusiasts worldwide are embracing it as a go-to solution for their skincare routines. Gua Share involves using a smooth-edged tool, typically made from jade, rose quartz, or other materials, to gently massage the face and body. The technique is designed to improve blood circulation, stimulate lymphatic drainage, and promote overall skin health. As videos demonstrating the art of Gua Sha flood TikTok, users are discovering its ability to provide a natural glow from within, making it an appealing option for those seeking a fresh and hydrated glow.
@lauragalebe ♬ original sound - Laura Galebe
Skincare guru and founder of SXCGLO, Farnaz Khan said: "We’ve witnessed an incredible surge in interest surrounding Gua Sha on TikTok. People are increasingly drawn to holistic and natural skincare methods, and Gua Sha fits perfectly into this trend. Its hydrating and rejuvenating effects are particularly appearing to those looking for effective solutions to enhance their skin’s health and appearance.
Gua Sha’s benefits go beyond hydration alone. Regular practice of this technique is believed to alleviate muscle tension, reduce the appearance of puffiness, and aid in the absorption of skincare products. With the right technique, Gua Sha can also contribute to sculpting and toning the face, offering a non-invasive alternative to traditional beauty procedures.
As the Gua Sha trend continues to flourish on TikTok, it’s clear that the beauty community has found a skincare gem that aligns with their desire for holistic, effective and natural solutions which is something I align myself as I’ve got a halal skincare brand also share similar skincare methods to help my customers achieve their desire skin goals.”
Farnaz Khan has shared that she regularly performs Gua Sha, as it helps reduce inflammation and puffiness on the skin. She has provided her top tips below for effective at-home Gua Sha practice and recommends doing this twice a week.
Here's how you can use your Gua Sha at home:
Step 1: cleanse your tools and skin
It's essential to perform Gua Sha only on clean skin. Ensure that your hands and the Gua Sha tool are clean, and use the tool after applying toner and cleansing your skin.
Step 2: apply serum
Apply a generous amount of serum to your face and neck. The serum will facilitate smoother tool movement and protect the skin barrier from pigmentation caused by rubbing.
Step 3: achieving sculpted skin with your Gua Sha
Hold the tool at a 30 to 45-degree angle and gently glide it across your skin. As a rule, all movements should be upward and follow the lymphatic flow. Repeat each movement three to five times before moving on to the next area of your skin.
Jawline and chin: glide your tool upwards from the centre of the chin out to the earlobe to contour the jaw.
Forehead: start at the centre of the forehead and divide it into three sections, then glide your tool outwards.
Cheek: begin at the nose and move upwards in a sweeping motion along the cheeks and cheekbones, progressing outwards toward your ears.
Under eye: start at the inner corner of the eye and glide outwards towards the temple.
Brows: glide upwards along the brow bone, moving from the inside out.
Lips: glide over your lips back and forth about five times for a plumping effect.
Neck: divide your neck into four areas and scrape each section from the bottom up.
Interested in more skincare tips? Have a look at this essential summer skincare routine in 3 simple steps.

Lizzie is T3's Home Living Staff Writer, covering the latest in style, wellness and beauty tech. From skincare gadgets to vacuum cleaners, she's your go-to for trends and top recommendations.
When not writing, Lizzie enjoys mooching around Bath, spending time with loved ones, or testing her review units – often during an enthusiastic cleaning spree!
-
 Oil pulling is going viral on TikTok for stopping morning breath – but does it actually work?
4 hacks that prevent morning breath, according to a sleep expert
By Bethan Girdler-Maslen
-
 PMD Clean Redvolution review: get clearer, younger-looking skin with this 2-in-1 cleansing brush
Deep cleansing and red light LED therapy? It’s a yes from us
By Joanna Ebsworth
-
 Buff LED Face Mask review: men deserve great skin too
It's specifically designed for the male complexion
By Lizzie Wilmot
-
 Shark CryoGlow review: the best LED face mask I've tested so far
Shark Beauty's entry into the skincare market has been nothing short of impressive
By Lizzie Wilmot
-
 Best Christmas gifts 2024: wellness, fragrances, grooming and more
If you're struggling to find the perfect gift, you've come to the right place
By Lizzie Wilmot
-
 7 fruits and vegetables to help your skin glow this autumn
Frustrated with tired, dehydrated skin? These fruits and veg will help you out
By Lizzie Wilmot
-
 CurrentBody vs TheraFace: which skincare tech brand should you choose?
Both beauty gadget pioneers deliver amazing results. But which one is better for your skincare needs?
By Joanna Ebsworth
-
 Beurer FC 52 Laguna Facial Brush review: 2-in-1 skincare that cleanses, massages and won’t break the bank
Is this the best facial cleansing brush under £50?
By Bethan Girdler-Maslen
